Pomegranate Party Trick

pomegranate-091021-0001Autumn brings us so many tasty delights, I look forward to it every year. I think Autumn may be my favorite season. In addition to beautiful fall foliage, we get beautiful squashes and pumpkins, gorgeous greens, and of course…pomegranates! I always get so excited when I pick up my first pomegranate of the season, and this year is no exception.

pomegranate-091021-0003Pomegranate seeds are not just pretty to look at and tasty as all get-out, but they are packed with nutrition too. They are high in vitamin C, potassium, antioxidants, and fiber, and are low in calories.

I love to put pomegranate seeds on just about everything, and they work really well with both savory and sweet dishes. I will sprinkle them on salads, soups, ice cream, overtop of pumpkin bread…anywhere I can think of.

One of my favorite things to do with pomegranate seeds is to float them in a carbonated beverage. Yes, pomegranate seeds can float! So today instead of a recipe, I offer you this formula for an impressive party beverage:pomegranate-091021-0002

  • Carbonated Beverage
  • Slice of lime (optional)
  • Pomegranate seeds

I love to use sparkling water for this, it is an almost-no-calorie treat. The pomegranate seeds sink to the bottom of the glass at first, but then float up onto a wave of carbonation. For a more adult beverage, I like prosecco, or even champagne.

TIP: I promise this trick can make even cheap champagne more impressive!

What other carbonated beverages can you think of to try? (Please don’t say beer!)

Szechuan Greens

turnip greens-091017-0003One of my husband’s friends gave us some Szechuan peppercorns a while ago as a gift. I was pretty stoked to get them, but didn’t have any immediate plans for them so I stuck them in a cupboard and kind of forgot they were there for a while.

turnip greens-091017-0002I don’t know why I remembered them all of a sudden on the weekend, but I decided to pair them up with some turnip greens that I had left over after making my slaw. Maybe I wanted to go Szechuan because I find turnip greens to be pleasantly bitter and a little bit spicy on their own, or maybe it was because I had just made another asian-inspired dish, I don’t know. But the results were delicious! And the good news is that I think this recipe would work with any kind of greens, not just turnip.

The Szechuan peppercorns really brought a nice flowery note to the dish. They don’t actually have a lot of heat themselves like black or white peppercorns do. If you’re not sure, try eating one whole, I think you will be surprised.

But back to the star of the show: Turnip greens.

One of the nice things about turnip greens is that you don’t have to remove all the stems, like you do with greens like chard and collards and kale; however I do trim away the larger stems closer to the root end if they seem tough. The parts of the stem that are still attached to the leaves are typically nice and tender. You can cook them at the same rate as the leaves, and they add a pleasant crunch to the dish.

Another nice thing about turnip greens is nutrition. Like most greens, they are low in calories, fat-free, cholesterol-free, high in fiber, and a great source of vitamins A, C, E, folate, calcium, B6, trace minerals, and chlorophyl, to name a few.

Can you believe that some people throw these delicious and nutritious beautiful babies away?

I like to use a wok for cooking greens, but use any large pot or pan that has a lid. This recipe makes enough for two large servings, or maybe 4 smaller side servings.

Szechuan Greens

Ingredients

    turnip greens-091017-0001

  • 1 tsp Szechuan peppercorns
  • 1 tsp chili oil or toasted sesame oil
  • pinch of salt
  • pinch of cayenne pepper (optional)
  • 1 tablespoon rice wine vinegar
  • 1 teaspoon sugar
  • 2 tsp canola oil
  • 1 tsp crushed chile flakes (optional)
  • 2 bunches turnip greens, trimmed and chopped
  • 1 tablespoon sesame seeds

Method

Toast szechuan peppercorns in a dry wok until just fragrant. Transfer to a spice grinder or mortar & pestle and grind.

To make the dressing, whisk together the ground peppercorns, chili or sesame oil, salt, cayenne (if using), rice wine vinegar, and sugar. Set aside.

Heat the canola oil in the wok until it is shimmering, and add the crushed chile flakes if using. Cook the chili flakes for about a minute. Add the turnip greens and toss to coat with the oil. Cook until they are wilted but still bright green, continuing to stir and toss them frequently. Put the lid on the pot when not stirring.

When the greens are tender and emerald colored, remove from the heat, and pour the dressing over top. Add the sesame seeds, and toss to coat. Serve hot, garnished with some extra sesame seeds if desired. Leftovers will last in the fridge for 2-3 days, and they taste good cold too.

Kohlrabi and Turnip Spicy Asian Slaw

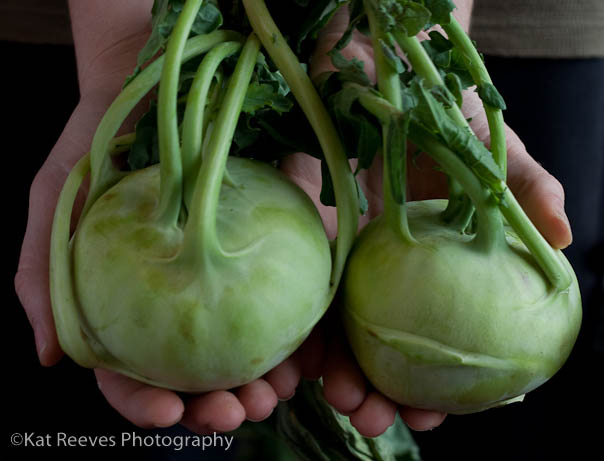
kholrabi slaw-091017-0003One of the cool things about doing a CSA is that from time to time something shows up in your share that you’ve never seen before. This week for me, it was kohlrabi.

If you’ve never tasted it, kohlrabi has a very mild, pleasant flavor. I found it to be kind of cabbagey tasting, in a very good way. It also has a very satisfying crunch which reminds me of broccoli. Apparently when kohlrabi is very young, you can eat it without having to peel it. But the outer layer of the large specimen we got was fibrous and tough, and it definitely needed to be peeled.

Our share this week also contained a bunch of turnips, and I had some left over carrots from the farmers market too. In light of this, I figured it was slaw time.

The dressing on this slaw is one that I use all the time with a shredded cabbage base, so feel free to sub in about a half of a head of cabbage if kohlrabi and turnips aren’t your thing.

This makes about 6-8 cups of slaw. When I’ve made (the cabbage version of) this in the past, I’ve often doubled it because it’s so tasty, and it does not last long in our house!

Kohlrabi and Turnip Spicy Asian Slaw

For the Dressing:

kholrabi slaw-091016-0002

Ingredients

  • 1.5 tbsp vegetable oil
  • 1.5 tbsp toasted sesame oil
  • 1.5 tbsp tamari, soy sauce, or Bragg’s Amino Acids
  • 1.5 tbsp rice vinegar
  • 2 or 3 garlic cloves, minced
  • 1.5 tsp sugar
  • Juice of 1/2 a lime
  • 5 thai chilis, sliced on the bias (or a seeded and chopped seranno  or jalapeno)
  • 1 small onion, thinly sliced

Method

Whisk together all ingredients except for the onion (you can also use a blender for this). Pour the dressing over the sliced onion in a large bowl, and set aside for half an hour to let the onions macerate slightly in the liquid. Stir occasionally.

For the salad

Ingredients

  • 1 large kohlrabi
  • 3-4 small turnips
  • 2 small carrots
  • 2 tablespoons black or white sesame seeds
  • 1 handful mint leaves, chopped
  • Other herbs of your choice (optional, but chopepd cilantro or parsley or thai basil would be nice)
  • Veggie “chick’n” strips (optional)

If your turnips still have their green tops attached, cut them off and set them aside for another use. Peel and trim all the veggies.

A food processor with the disk for shredding works best for the veggies. Shred all the veggies, and add them to the bowl with the onions and dressing. Add the sesame seeds, mint leaves, and “chick’n” strips and other herbs (if using). Toss the slaw to coat with dressing. Garnish with extra sesame seeds and herbs.

Serve right away, or tuck it into the fridge until you are ready. This lasts about 4 or 5 days in the fridge, but is best the day it’s made.
kholrabi slaw-091016-0001

Chestnuts Demystified

chesnuts-091011-0001

Have you ever tasted a chestnut?

If you buy them pre-cooked in jars at the store, they tend to be pricey. I believe I saw some last year for about $10 at wholefoods, and the contents of the jar was probably only about 2/3 cup. That seems prohibitively expensive to me, and so I had never cooked with them.

But then last week at the farmers market, I saw a pint of fresh chestnuts for $4.00. I snatched them up without a real plan for them.

When I got them home, I was like…how am I going to cook these little buggers? “Chestnuts roasting on an open fire?” That sounds a little dicey to me. So I researched a little and decided to peel and boil them.

And now I know why they are so expensive in the store…it is definitely a manual process but the taste…oh my goodness, chestnuts are SO supple and delicious with an earthy sweetness. And the texture is unexpectedly soft and creamy, they practically melt on your tongue.

If  you have access to reasonably priced chestnuts–at a market, a store, or if you have a neighbor with a chestnut tree–I recommend trying to cook them yourself at least once. After you taste them, you will know it is worth the effort!

Chestnutschesnuts-091011-0002

Ingredients

  • 1 to 2 cups fresh, raw, in-shell chestnuts
  • Water
  • Salt

Method

First thing you need to do is get the shell off, and this is a lot easier if you do a quick cook of the nuts first. Put a pot of water on to boil (you only need just enough water to cover your chestnuts by about an inch). Meanwhile, use a paring knife to score the shell with an ‘X.’ Try not to cut too deep into the actual nut when you do this.

Drop scored chestnuts into boiling water, turn the heat down to medium, and simmer for 5 minutes. Turn the heat off, and use a slotted spoon to remove a few chestnuts at a time from the water. They will be very hot, so let them cool for a minute or two before handling. Using your fingers, remove the shell and the fibrous covering over the chestnut. If any shells seem particularly stubborn, return to the hot water for a few more minutes to help loosen them.

TIP: You may find a worm in one or two of your chestnuts. How do they get there? I don’t know. But throw these chestnuts away. You may also find some chestnuts that look kind of black or otherwise “not quite right.” Don’t waste your time on them, just toss ’em and move on. Out of my pint, I probably had to throw away about 8 to 10 chestnuts. But there were still plenty to work with.

BONUS TIP: Removing the shells is the part that is a little tedious, so stream some Hulu or listen to a podcast while you work. :)

Once all your chestnuts are free from their shells, put a fresh pot of water on to boil, season generously with salt. Turn the heat down to medium, add your chestnuts, and simmer until they can be pierced easily with the tip of a knife, about 20-30 minutes depending on the size of the nuts.

Drain, and allow to cool. These will keep in the refrigerator for a little over a week.

Stay tuned for ways to use your delicious chestnuts!

chesnuts-091017-0003

Baked Flour Tortilla Chips

tortilla chips-091011-0002

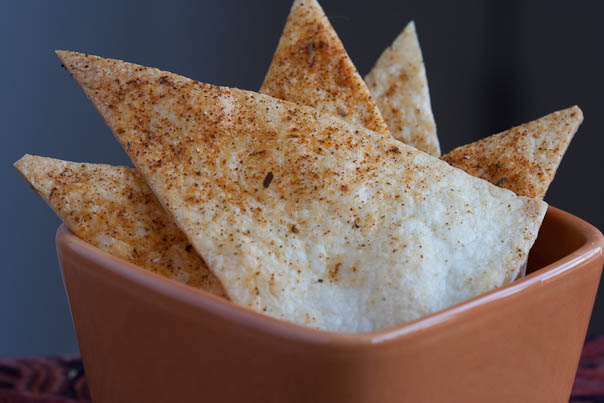
My husband and I used to eat at a local restaurant where they’d always present a lovely bread basket at dinner time. It featured some kind of crusty white bread, some corn bread, and some delightfully crispy and spicy baked tortillas. For me, it was the tortillas that always stole the show, and so I decided to figure out how to make them.tortilla chips-091010-0001

I was happy to find that they are deceptively easy. The texture is so light and crispy, and you can really dial them in by playing with the spices any way you like. These are great for rounding out a bread basket, dipping into hummus or guacamole, or as an impressive garnish for a hearty soup or stew.

They are also great for straight-up snacking, and beat the pants off store-bought flour chips!

Have I mentioned they are EASY??

Baked Flour Tortilla Chips

Ingredients

  • 1 package fresh flour tortillas (white, whole wheat, or whatever you like)
  • 1 tablespoons olive oil
  • Spice blend from my pumpkin seed recipe, OR chili powder and a little salt

Method

Preheat oven to 375 degrees.tortilla chips-091011-0003

Use a pastry brush to lightly brush just the top side of each of the tortillas with olive oil, and then dust liberally with several dashes of spice blend or chili powder and salt. Place the tortillas in a stack as you go. When you are done, move the bottom tortilla to the top of the stack (this puts the bottom of that tortilla in contact with the oil and spice from the tortilla below it).

Cut the stack in half, then in half again, and then again to make wedges (a bread knife works best for this, cut gently). Arrange wedges in a single layer on cookie sheets.

Bake for 8-12 minutes, rotating the pans half way through baking time. When I rotate the pans, I also like to move the chips that are on the outside to the center of the pan for even baking.

These are done when they are lightly puffed and crispy (if they start to turn a little brown, they have gone too far so try to pull them out before that happens). Let them cool on a wire rack, and store in a large glass or plastic container.

tortilla chips-091011-0004

Sketti-O’s

sketti-os-091011-0002
Did you eat Spaghetti-O’s as a kid?

I am not ashamed to admit that I grew up eating Spaghetti-O’s, and I absolutely adored them. I loved them so much that I continued to eat them in college and into my early adulthood.spaghettios

But then I went vegan, and took a closer look at the Spaghetti-O’s label. Of course they are NOT vegan. And I was also kind of horrified to find that they are full of preservatives and chemicals that I’d rather not put into my body. So just like that, they were out of my life…

…until recently. A few months back, I was randomly thinking fondly back on my Spaghetti-O’s days, and I thought, “hang on, why not make my own healthy vegan version?”

And so this recipe was born.

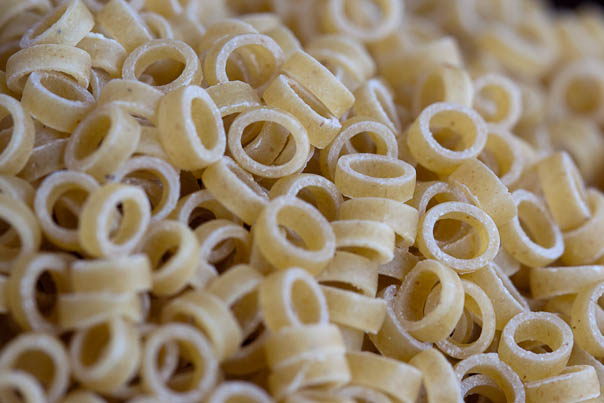
It’s a one-pot recipe that’s really easy to make. The hardest part of this recipe is probably finding the pasta rings. There is only store that carries them in my area, but I think alphabet pasta would be a really fun substitute, and easier to find.

I always added hot sauce to my Spaghetti-Os, and so this recipe is a little bit spicy; but feel free to leave out the heat if that’s your preference.

This makes about 12 one-cup servings, or 6 to 8 larger servings. It will keep really well in the fridge for up to a week, so don’t worry about making such a big batch. You’ll gobble it up pretty quickly anyways.

Home Made Sketti-O’s

Ingredients

  • 4 cups spaghetti sauce, preferably home made
  • 5 cups of water
  • 9 oz. (can and a half) tomato paste
  • 1.5 tablespoon onion powder
  • 1.5 tablespoon garlic powder
  • 1 – 2 tsp. cayenne pepper and/or hot sauce (optional, only add if you want a little kick)
  • 1 – 2 tsp salt, or to taste
  • black pepper
  • 12 oz ring or alphabet pasta
  • 1/2 cup nutritional yeast (optional)

Method

In your blender, combine the spaghetti sauce, tomato paste, spices, salt, and pepper, and as much water as you can fit without overwhelming your blender. Blend until the mixture is entirely smooth, and put it in a big pot. Put the remaining water into the blender and swirl it around to get all the good stuff off the sides, and then pour it into the pan. Stir to combine. The sauce will look very watery.

Heat the sauce over high heat until it comes to a rolling boil. Add the pasta rings and lower the heat to medium. Cook until the pasta rings are soft and the sauce has thickened, about 20-25 minutes. Stir frequently to keep the pasta from sticking to the bottom of the pot. When pasta is fully cooked, stir in the nutritional yeast, if using. Put the lid back on the pot and let it sit for 10 minutes before serving. Adjust seasoning to taste. If the sauce is too thick, add more water until it is the consistency you like.

sketti-os-091010-0001

Spicy Roasted Pumpkin Seeds

pumpkin-seeds-091011-0004
It’s that time of year…everyone I know is cracking open pumpkins and carving them into spooky visages. This was a favorite ritual of mine as a kid, and one of the best parts about carving a pumpkin is the gorgeous seeds that are harvested from the innards. I remember trying to roast the seeds once or twice as a kid; I didn’t really know the best way to go about it and I ended up with burned, salty, unpleasantly chewy bits. But I didn’t know better so I ate them anyways.pumpkin-seeds-091010-0002

I forgot all about roasted pumpkin seeds until last year when I went to make a vegan pumpkin pie. I got a fresh pie pumpkin from the farmers market, and pulled out the seeds. I hate to throw anything away, so I did a little research on the best way to roast the seeds. Of course I had to give it my own twist and up the ante with a little kick.

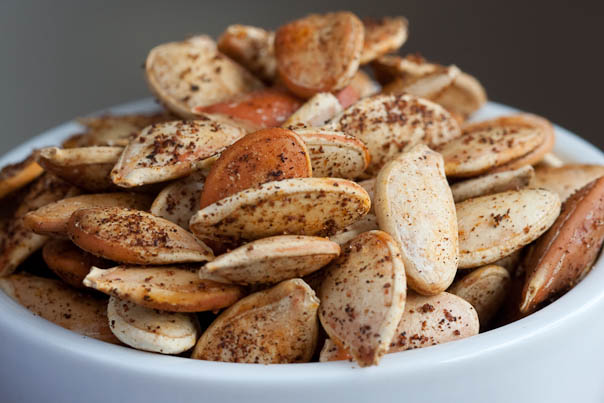
These are the perfect pumpkin seeds. They are crisp and crunchy, and the spices really make them something special. My husband actually thinks they taste a little like bacon bits, but neither of us has had bacon in years, so I think he is saying that because of the combination of salt and crunch.

One of my favorite things about this recipe is listening to the crackling of the pumpkin seeds as they’re cooling; for some reason it is a very satisfying sound.

TIP: If you don’t have fresh pumpkin on hand, you can always buy your pumpkin seeds online.

Spicy Roasted Pumpkin Seeds

Ingredients

pumpkin-seeds-091011-0003

  • 4 cups pumpkin seeds, washed and squeaky clean
  • 4 tablespoons salt
  • 2 tablespoons olive or canola oil
  • cooking spray
  • spice mixture (see below)

Method

Preheat your oven to 400°F, and adjust your oven racks to accommodate 2 cookie sheets.

Put a large pot of water on to boil (around 4 quarts water). Put the salt into the water.

When the water is at a rolling boil, add pumpkin seeds and boil for 10 minutes, stirring occasionally.

Meanwhile, brush a tablespoon of oil onto each of your cookie sheets.

When time is up, drain pumpkin seeds and transfer to your lubed cookie sheets. Give them a stir to coat them with some of the oil, then spread them out into a single layer on each sheet. Pop the cookie sheets into your hot oven for 20 minutes. When time is up, pull the cookie sheets out one at a time, stir the seeds, and redistribute into a single layer. Rotate cookie sheets, and cook for another 20 minutes. The seeds will start to crack and pop and jump in the oven. Enjoy the show.

When time is up, remove cookie sheets from oven, turn off the oven heat, but close the door to keep as much heat in the oven as possible. Working quickly, spray each sheet with cooking spray, and then dust generously with the spice mixture. Stir the seeds, repeat one more time with cooking spray and seasoning, and then spread them back out into a single layer on each sheet. Return to the hot oven for 5 minutes. Remove the pans from the oven and let cool completely before eating.

Note: If the oven is still roaring hot, the spices that are left on the pan may produce a little smoke; but if so, don’t worry about it, that will actually add to the flavor.

Spice Mixture

  • 1 teaspoon chili powder
  • 1 tablespoon paprika
  • 1 tablespoon ground cumin
  • 1/4 teaspoon cayenne pepper
  • 1 teaspoon fine sea salt (or table salt)

Combine all ingredients in a small jar, an empty spice jar would be ideal. Shake to combine.

Here is where you can really get creative with this. Add some turmeric, play around with the heat by adjusting the cayenne, reduce the cumin, or add some crushed thyme or oregano. It’s up to you! Make it the way you like it.

pumpkin-seeds-091010-0001

Party Time Veggie Pressed Sammich

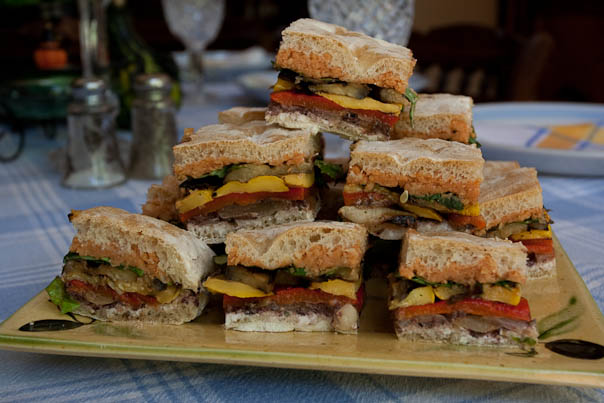
sammich-091004-0012Get ready to impress your friends at your next party…this beautiful sammich is bursting with garden veggie flavor and I am pretty sure that no one can resist its charms.

I won’t lie to you though, it takes a little planning. You need to make this sammich the day before you plan to serve it. Aside from that, you can make it as easy or as complicated as you want. And when  it’s party time, all you have to do is unwrap, slice, and serve. No last-minute rushing or fussing in the kitchen. It’s also very portable so you can take it with you if the party is offsite.

sammich-091003-0004The easiest way to make this  work is to use store bought items for the roasted red peppers, tapenade, and bread.

But I am a control freak in the kitchen, so I always make my own tapenade, grill or roast my own red peppers, cook my own beans, and make two loaves of ciabatta from scratch.

So do it however you like, it will still be delicious. I am not going to post recipes for tapenade or ciabatta here, because I trust you can find recipes you like if you want to do everything by hand.sammich-090920-0002

Note that you will have to make the chick pea filling, which was inspired by my girl Kelley of StoneArch Cakery. But it’s really easy and TOTALLY worth it.

This recipe makes enough for two mega huge sammiches, but cut it in half if you don’t need that much. If you have any veggies left over, they will keep in the fridge, and are great to toss into wraps, salads, pizzas, etc.

Party Time Veggie Pressed Sammich

Ingredients

  • 3 cups cooked chickpeas (which is 1 cup dried beans, soaked and cooked)
  • 1/4 cup fresh lemon juice
  • 6 large cloves garlic
  • 3 tbsp tomato paste (this is half of one of those 6oz cans)
  • 1 tsp salt
  • pepper, to taste

  • 1/3 cup olive oil
  • 1/3 cup balsamic vinegar
  • 1 tablespoon herbes de provence
  • 3/4 tsp salt
  • pepper, to taste
  • 6-8 roasted red peppers
  • Assorted vegetables for grilling or roasting (I usually use 2 small eggplants, 4-5 zucchini, 4-5 yellow squash, 2 large onions)

  • 1 cup tapenade (home made or store bought)
  • 1 8oz. tub Tofutti cream cheese
  • A large bunch of basil
  • Two large flat loaves of bread, such as ciabatta or focaccia

sammich-091004-0014

Method

TO MAKE THE CHICK PEA FILLING

Put the chick peas, peeled garlic cloves, lemon juice, tomato paste, and salt and pepper into your food processor. Grab your jar of roasted red peppers and tip about 1/4 cup of the liquid into a measuring cup, then add half of that to the food processor. Process until you get a stiff paste, adding slightly more of the red pepper liquid if needed. (This needs to be a pretty stiff mixture, if it’s too runny it will make the bread damp, and will drip out of your sandwich onto your guests’ laps.) Refrigerate until ready to use. You can make this up to 4 days in advance.

TO MAKE THE VEGETABLES
sammich-091003-0006

Good news: Veggies can also be prepped 2-3 days in advance and stored in the fridge until you are ready to use them.

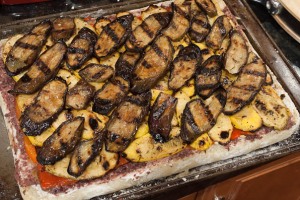
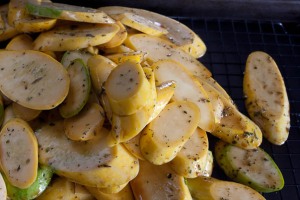
Slice your veggies about 3/8 inch thick (for skinnier squashes and eggplants, I like to slice on the diagonal so that I get bigger planks). In a large bowl, whisk together the olive oil, balsamic vinegar, salt, pepper, and herbes de provence. Toss your veggies in the marinade and then pull them out and let the extra marinade drain off in a colander or on a cooling rack set over a cookie sheet. (You may need to make a little extra marinade, depending on the amount of veggies you have.)

TIP: To prep your onions for grilling, cut 1/2 inch rounds, and thread them onto bamboo skewers that have been soaked in water for at least 30 minutes. This will keep your grilled oniony goodness from falling through the grill grates.

If GRILLING: Set the grill on high and give it a scrub with a wire brush. Reduce the heat to meduim, and arrange your veggies in a single layer. Grill about 5 minutes per side, or until you get some nice grill marks and tender veggies (cooking times may vary depending on your grill). Try to avoid charring the crap out of your veggies. You will probably need to do several batches.

If ROASTING: Pre-heat the oven to 400 degrees. Arrange veggies in a single layer on parchment paper or a greased cookie sheet. Cook 10 minutes, flip the veggies, and return to the oven for another 10 minutes, or until they are tender.

TO ASSEMBLE
sammich-091003-0008 sammich-091003-0009
sammich-091003-0010 sammich-091003-0011

Grab your ciabatta or focaccia, and with your knife blade parallel to the countertop, slice the bread the long way so that you get two large open-faced halves. Hollow out the interior crumb of the bread to make space for the filling. Repeat with the other loaf.

TIP: Save that bread that you pulled out! Toss it in the food processor and make bread crumbs. Store them in a zip top bag in the freezer until you need them.

Take the bottom half of the first loaf of bread, and spread half of the Tofutti cream cheese over it, making sure that there is no bare bread poking through. (This is important to “waterproof” the bottom of your sammich; without this, the bottom gets soggy from the vegetables.) Spread half of the tapenade overtop of the cream cheese. Layer your onions over that, then follow with a layer of eggplant, and a layer of squash and/or zucchini. Grab 3-4 roasted red peppers an spread those out over top.

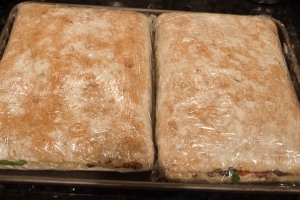
Take the corresponding top half of the bread and spread the chick pea filling over top. Make a layer of whole basil leaves over this, pressing them into the filling. Carefully take the top layer of the bread, and place it over the bottom half. Wrap the whole thing tightly in plastic wrap. Repeat with the other loaf.

Place both wrapped sandwiches on a large cookie sheet. Place another cookie sheet on top of the sandwiches. Place the cookie sheets in the fridge, and put something heavy on top. Jars of tomato sauce or soup work great for this.

Let the sammich sit for 8-18 hours. When ready to serve, remove the plastic wrap, and use a bread knife to carefully slice the sandwich into squares.

sammich-091004-0015

Grilled Pizza

grilled-pizza-091002-0004My brother Dave came over to visit the other day, and–since it was around dinner time, and since he is the designated family grill meister–we made grilled pizza.grilled-pizza-091002-0001

If you’ve never had grilled pizza, you MUST try it. It’s easy to prepare, FUN to make, and very tasty to eat. This is a really great thing to do with guests too, because everything can be prepped in advance. AND everyone can have their own pizza JUST the way they like it.

For grilled pizza, I use an America’s Test Kitchen recipe for the crust, but I think any pizza dough recipe would work fine, as long as you rolled it out a little thicker than you normally would.

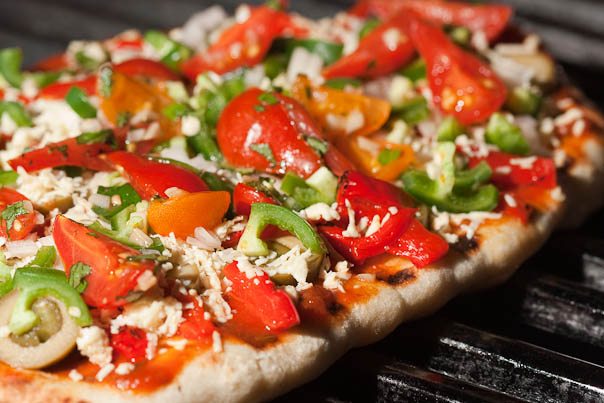
grilled-pizza-091002-0002 I love getting creative with our toppings, and this week I put out roasted red peppers, diced shallots, chopped jalapenos, sliced green olives, and tomato salad. But out of three of us I I was the only one who used ALL of those things on one pizza!

So the way this works is that you take the rolled-out dough to your hot grill and cook just one side. We have a Weber grill with burners that run the length of the grill from side to side, and I picked up a few tips from Dave this week on the best way to cook pizza on this type of grill: grilled-pizza-091002-0003

  • He got the grill roaring hot first with all burners on high, and cleaned the grate with a wire brush.
  • He turned off the burners and then cautiously sprayed it with non-stick cooking spray (you may still get a momentary flare up so be super careful).
  • He turned the grill back on, but set the middle burners as low as they would go.
  • The outer two burners were turned on to just a few ticks above medium.
  • He cooked our pizza in the middle of the grill via the indirect heat of the outer two burners.

Tip: If  you have a grill where the burners run front to back, these hints from Dave will still apply, but your primary heat sources will be the sides instead of the front and back.

grilled-pizza-091002-0005So once Dave had cooked all of our pizza dough rounds on one side, we brought them into the kitchen and arranged our sauce and toppings on the cooked side. (Did I forget to mention that we also had some of the amazing Daiya cheese? Cos we did.)

Then the pizzas went back out onto the grill to finish cooking. Dave left the grill lid closed pretty much the whole time to allow the cheese and toppings to cook, but he did check the underneath of our pizzas a few times to make sure they weren’t cooking too fast.

The result was AWESOME pizza with beautiful grill marks, a crispy crust, and excellent flavor. Each one was a work of art. They were almost too pretty to eat…ALMOST…. :)