Chili Garlic Oil

Have you ever noticed those fancy flavored oils at the grocery store? They seem like a great idea, another way to infuse extra flavor into your food. Trader Joe’s used to make an amazing chili oil that I loved, but then they discontinued it and I was so bummed. Then I found that my local CostCo had introduced a delicious garlic oil…that cost $12 per Liter, yikes. It also seems to have been discontinued.

But there is really no need to go on a big hunt or spend a lot of money on delicious flavored oil. I know I’ve mentioned garlic oil in a few other posts, but it is really really ridiculously easy to make your own. It is cheap to make, and YOU control the quality of the ingredients.

I love home made flavored oil and use it as a base for building all kinds of flavorful meals. Here are a few ideas:

  • Use it to make popcorn
  • Brush it on pizza crusts before topping and baking
  • Dip crusty rustic bread into it
  • Start your soups and stir fries with it
  • Put it in your pan for grilled cheese, instead of buttery stick
  • Make a spicy salad dressing
  • Use it anywhere you would use oil or fat, to add a little extra kick

This stuff is so good, that I plan to get some cute little bottles and give it away as gifts at holiday time, along with some recipes. I will probably make two versions, one that is just garlic and one that is just chili. But the recipe I’m giving you here covers both. If you just want garlic oil, leave out the crushed chilis and vice versa.

So try it and let me know what you think. You can try this method with other aromatics too, I think cinnamon and cloves would be a fun combination, useful for sweets and Lebanese or Moroccan dishes. What else would you try? What would you use it for?

Chili Garlic Oil

Ingredients

  • 1/4 to 1/3 cup crushed red pepper, depending on your tolerance for heat (I like to use the really spicy kind)
  • 12 cloves (about one bulb) garlic, chopped or pressed
  • 4 cups olive oil (suitable for sauteeing or frying, NOT extra virgin), or canola, or other relatively flavorless oil

Method

Put chilis, oil, and garlic into a deep sautee pan and place over low heat.

Note: DO NOT be tempted put the spurs to the heat in order to speed up the process; trust me, you will burn the garlic and the chilis and that will make you a very sad panda.

On my stove, I set the heat to 3 (out of 10), then when the garlic starts to sizzle a little, I turn it down to 1. It takes about 10 minutes to get to the sizzly-garlic stage, but this may vary depending on the quantity of oil you are preparing and the power of your cooktop. Once you have sizzly-garlic, let the oil sit over low heat for about 15 minutes, then kill the heat.

Let the oil cool for about an hour before handling. Seriously, don’t try to strain boiling hot oil.

Strain the oil through a fine mesh sieve into a clean container. Discard solids into the trash can (your kitchen plumbing doesn’t want all that oily goop). Strain a second time through a paper towel (see photo above) or coffee filter to clarify and catch all the tiny pieces that slipped through the first time.

Note: Don’t try to skip the first straining, if you go straight to the paper towel it will take a very long time. Also, it is important to strain the second time in order to remove all the garlic for food safety reasons.

Store in a clean, closed container at room temperature for a few weeks…maybe longer, I don’t know exactly because we go through this stuff pretty fast. If it develops any off odors, gets cloudy, grows anything funky, or talks sass to you, discard.

Autumn Fruit Muesli

Wow, it’s November and it’s been a loooong time since I posted. Partly it’s because I have been saving up ideas for Vegan MoFo (woo woo) and partly it’s because I’ve been busy. But I’m really going to try to commit to this MoFo business again this year because it was so fun last year, and I got a lot out of it.

So, I’m kicking it off with my favorite breakfast cereal. Go go, Muesli!

There are a lot of reasons that I (heart) muesli. It’s really versatile, but it has less fat than granola and no added sugar. Oats are the base, which are super high in fiber and nutrients (including iron and thiamin). Best of all, you can customize the flavors of your muesli any way you like. I have listed an autumn version here, but in the spring time I might do berries and almonds and cardamom or in summer I might do pineapple and cashews and lime. You can sub in barley flakes* for some of the oats, use any kind of dried fruit or nut or seed you like. Sometimes I mix it up just because I’m trying to clean out the pantry, rather than go with a seasonal variation. These basic proportions will get you started, but mix it up however you like.

And let me know: what variations did you try?? What was successful? Or NOT??

* If using barley flakes, just note that they are not gluten-free.

Autumn Fruit Musesli

Ingredients

  • 6 cups rolled oats (make sure to look for gluten-free oats if that is a concern to you)
  • 1 1/2 cups pecan pieces
  • 1 1/2 cups chopped dried apples
  • 1 1/2 cups chopped dried banana
  • 1/2 cup sunflower seed kernels
  • 1/4 cup flax seeds
  • 1 tbsp cinnamon (optional)
  • several dashes fresh grated nutmeg (optional)

Method

Preheat oven to 350F.

If your pecan pieces are big, give them a rough chop. Spread oats and pecans over the base of a roasting pan or a few cookie sheets (I have a big tin roasting pan that I bought at the grocery store for about $1, specifically for this purpose). Cook for about 30 minutes, stirring or shaking every 10 min or so. Your nose will tell you when it’s about ready, the oats and the nuts will smell fragrant and…well, nutty. Let the mixture cool slightly.

Meanwhile, mix all remaining ingredients in a large bowl. When oat mixture is cool enough to handle, add to the bowl and toss to combine. I like to use clean hands for this.

Store in an airtight container (I use a two-quart mason jar with a lid). Serve with almond milk, non-dairy yogurt, and some seasonal fresh fruit.

Makes about 10 cups of muesli.

Green Garlic and Kale

Last week at the farmers market, I found some green garlic. I’ve had green garlic before that looks more like spring onions, but as you can see from the picture here, this bunch of green garlic was a little more mature. I’d never worked with it this way before but the nice guy who sold it to me assured me that practically the whole thing is edible. So I was sold!

In order to use green garlic in this state, it is necessary to remove the hard central stalk. To do this, I cut the bulb end off and then cut that in half. I removed the roots and the inner stalk. Then I peeled off the outer two or three layers, which are thin, kind of like spring onion. Inside the bulb, the cloves had only just started to show signs of differentiating. For the stalk, I used the tip of a knife to score its length, and pulled out the hard stalk from the center. Then I washed the leaves the same way that you would wash leeks, and trimmed the ends. I sliced the stalk into ribbons, and chopped the bulb.

The flavor of green garlic is extremely mild when eaten raw, and won’t leave you with bad breath. So I decided to use it in a raw kale salad. If you don’t have access to green garlic, this recipe goes great with anything that has a mild onion or garlic flavor. I’ve done it with green garlic, spring onions, and shallots each quite successfully. To further amp up the garlic flavor even further, use garlic oil.

This recipe makes a lot, but the salad keeps well in the fridge for days and makes a great snack.

Green Garlic and Kale Salad

Ingredients

  • 2 bunches of kale, leaves removed from the stem
  • 1 chopped green garlic bulb or two finely diced shallots
  • 1/4 cup freshly squeezed lemon juice
  • 3/4 tsp salt
  • 1/2 tsp freshly ground pepper
  • 1/2 cup olive oil or garlic oil

Method

Roughly chop or slice the kale and place in a large bowl. In a separate bowl, combine the remaining ingredients and whisk to emulsify. Pour over the kale and use tongs (or your hands) to toss. Make sure the kale is evenly coated. Set aside to let the kale wilt slightly at room temperature for 30 minutes or longer (an hour would be great). Taste, and adjust seasoning if necessary.

Peas and Carrots with Mint

English peas are one of my favorite spring time veggies. And I know it’s kind of old-fashioned of me, but when I get my hands on some, I just cannot resist making peas and carrots. I have memories of eating peas and carrots when I was a kid but I can’t remember if they were made from fresh or from a can. Whichever it was, I’m just glad that I can recreate that taste memory as an adult, with my own twist.

At my farmers market, there are usually two options for english peas. You can buy them whole in the pod, or you can buy them already shelled. The shelled ones cost a premium, and I don’t mind the time it takes to shell the whole ones so that’s usually what I go for. Shelling peas is also a great job for a kid or a partner who wants to help.

As far as modifications go, the sky’s the limit on this one. You could certainly substitute frozen peas for this dish (but I make no guarantees as to its success). You can also play around a lot with the ratio of peas to carrots, depending on what you like. Pretty much any fresh herb will play well with this dish, I’ve done it with parsley, basil, and dill, but mint is my favorite.

I also don’t cook the carrots very much because I don’t like mushy carrots, but if you like them softer, just give them a few more minutes in the pan before you add the peas.

This recipe makes a lot, so halve it if you aren’t sure how much you want. It reheats well, and I have certainly been known to eat cold peas and carrots for breakfast…

Peas and Carrots

Ingredients

  • 2 quarts whole english peas, shelled OR 3 cups shelled fresh or frozen peas
  • 4 or 5 medium carrots, cut into pea-sized dice
  • 1 1/2 tablespoon of olive oil, garlic oil, or earth balance
  • 2 tsp salt
  • A few dashes fresh cracked black pepper
  • 1/2 cup chopped fresh mint

Method

Heat oil in a skillet over medium-high heat. Add carrots and cook 1-2 minutes. Add peas and cook another 3-4 minutes, or until all the veggies are done to your liking. Season with salt and pepper. Remove from heat and stir in the fresh herbs.

Serves 4

Strawberry Lime Marmalade

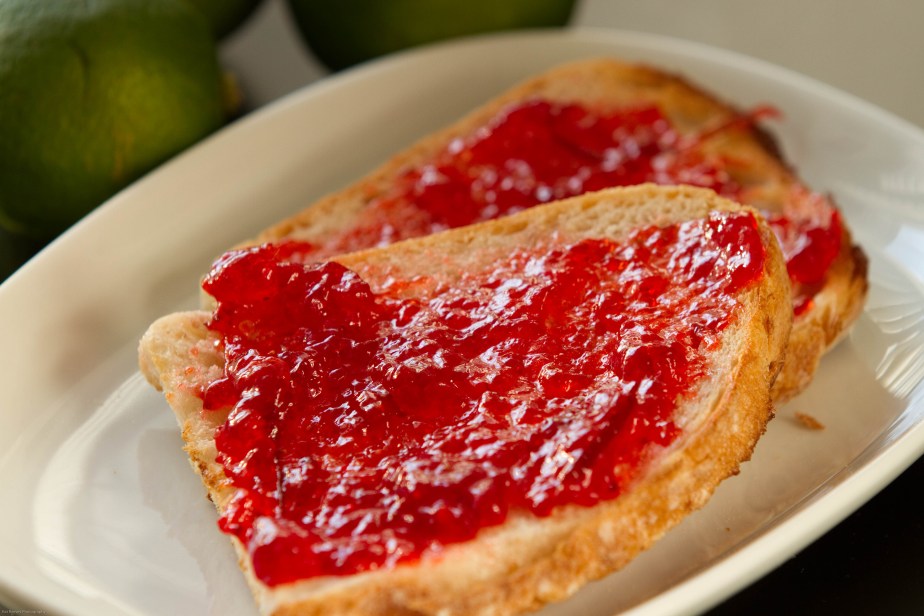
Hello world! I’ve been super busy these past few months, but I’m really thrilled that it’s finally farmers’ market  season here in the mid-atlantic. I will be flexing my canning and preserving muscles in the coming months in oreder to try to hang onto some of this wonderful summer flavor well into the winter. Strawberries are still coming into the markets right now, so I’ve been making jam and preserves. I thought I’d try something a little different with one of the batches I was working on so I modified a recipe out of the Ball Blue Book and created a gorgeous strawberry lime marmalade.

Now, I was a little hesitant to call this a marmalade because–for me at least–the word “marmalade” conjures up memories of a bitter orange jam. But the step of boiling the peel before you make the jam draws out all the bitter flavors and you are left with just a pleasant lime taste. Technically, anything with citrus peel in it is considered marmalade. So I went with it.

There are a couple of ways to get the peel you need. The easiest way is to use a vegetable peeler to peel thin slices of the rind and then chop that. But I was very concerned about bitter flavors and wanted to make sure I just got the zest, so I used a zester instead. (There is a picture with my Lime Icebox Cookies post of the tool I used if you are not sure what I’m talking about.) I needed to zest about 3 limes to get the amount that I needed.

If you are new to canning, I highly recommend the book Putting Food By as an excellent primer on all methods of food preservation.

Strawberry Lime Marmalade

Ingredients

  • 1/4 cup thinly sliced lime peel
  • Two generous quarts strawberries, washed and hulled, any bad spots trimmed
  • 1 package powdered pectin
  • 1 tablespoon lime juice
  • 6 cups sugar

Special Equipment

  • 7-8 half-pint jars with lids and rings, sterilized
  • Jar lifter
  • Jar funnel
  • Lid lifter
  • Boiling water canner

Method

Cover lime peel with water and boil 5 minutes. Drain and discard the liquid (trust me, it is too bitter to use for anything).

Meanwhile, place the strawberries in a very large pot (I use an 8 quart pot) and crush with a potato masher until there are no whole pieces and lots of juice has come out; it should measure about 4 cups. Add the drained lime peel, lime juice, and powdered pectin and stir to combine. Bring to a boil and then add sugar, stirring until dissolved. Return to a rolling boil. Boil hard for 1 minute, stirring constantly. Remove from heat and skim the foam. Ladle into hot jars, leaving 1/4-inch headspace. Adjust lids and rings. Process for 10 minutes in a boiling water canner.

Leave on the counter untouched for 24 hours before checking seals. Remove rings and label the jam. Store in a cool place. Any jars that did not seal can be stored in the refrigerator.

White Bean and Sage Dip


I was originally not going to post this recipe because I whipped it up in a hurry and thought it was too simple. But then I took it to a party with me last night and was surprised to find that it was a huge hit! I guess simple is often better.

Originally I was inspired to make this because I have a sage plant growing in my kitchen that was looking a little scraggly, and was desperately in need of a trim. As I’m sure you are aware, pruning your herb garden means cooking with the cast-off trimmings. I think most people think of sage primarily for things like turkey and stuffing, but since we are vegan and gluten-free, I had to come up with another way to use it. I remembered that sage pairs really well with white beans, and since I knew I had a party coming up, I figured I’d make a dip to stand in for the ubiquitous hummus platter.

Working with sage is a really enjoyable experience. If you’ve never played with fresh sage in your kitchen before, I think you will be pleasantly surprised. Not only does it smell amazing, but the tactile experience is fun too. Sage is furry! And it chops up really fine without getting crushed and soggy like some other herbs can.

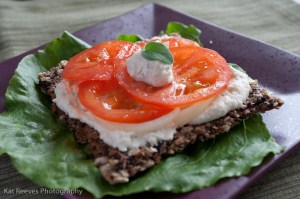
This dip is great with veggie crudites, the same way you’d eat hummus. But also really does well as a spread on crackers or bread. I spread my leftovers on a raw gluten-free “bread,” topped it with lettuce, onions, tomatoes, and a tiny bit of fleur de sel for an open-faced sandwich. Heaven.

I used cannellini beans for this, but I think navy or great northern beans would work great too. I also opted to use garlic oil instead of putting raw garlic into the dip because I wanted only the tiniest hint of garlic, and I didn’t want it to overwhelm the sage. If you are a garlic nut, go ahead and toss a few cloves in and see how it goes.

NOTE: You can easily make your own garlic oil by slicing the cloves from a bulb of garlic and warming them gently in about a cup of oil. You don’t want them sizzling violently and jumping out of the pot, just heated through enough to infuse flavor into the oil.

White Bean and Sage Dip (or Spread)

Ingredients

  • ½ pound (1 cup) white beans, soaked and cooked OR 2 cans beans, drained and rinsed
  • Juice of 1 lemon (meyer lemon if available)
  • ½ teaspoon salt, or more to taste
  • Fresh ground black pepper
  • ½ cup garlic oil or fruity olive oil
  • A large palmful of sage leaves, chopped fine

Method

Place the beans, lemon juice, salt, and pepper into a food processor and process until a thick paste forms. Using the feeder tube and with the food processor still running, add the oil. Continue to process until the texture is very smooth. Add the sage leaves and pulse a few times just to mix them in.

Serve as a dip or a spread. Will keep in the fridge for several days.

Makes about 3 cups

Spanish Chickpea Stew


So this blog has been quiet for a little while…

A few weeks ago, my husband was diagnosed with a gluten sensitivity and was advised to immediately and permanently eliminate gluten from his diet. Since I am a good wife (or at least trying to be), I decided to go gluten-free as well to support him. It has been a big adjustment for both of us, and it has also meant that I have had to give up one of my favorite hobbies: baking. But we’re finding new and exciting foods to try, and we both feel great. So this blog is probably going to take a slightly different direction from now on as I explore vegan, gluten-free foods.

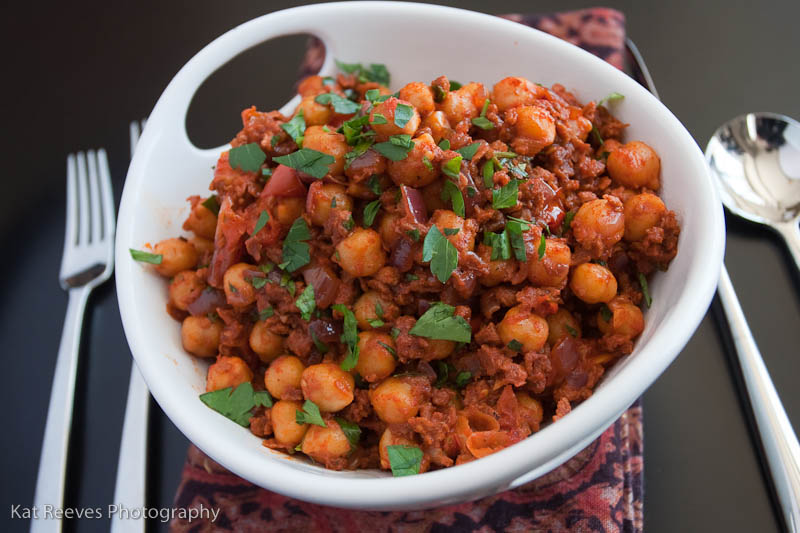
To kick it off, I’m going to start with this hearty Spanish-inspired chick pea stew. When I first made this shortly after Will got the instructions to go gluten-free, he was excited. He said it filled his desire for “junk-food fast-food taste” without actually being junky. I’m not sure if that’s the best way to sell this dish, but I will tell you it is easy to make and it is damn good. The chick peas really make this a hearty and filling dish.

One of the things you will need to find in order to make this dish is a gluten-free soy chorizo. Trader Joe’s has one that is labeled gluten-free, and that’s what we used. If you aren’t concerned about gluten, then use whatever veggie sausage you like, just dice it up before adding it to the pan.

You could serve this tapas-style with a few other small dishes, I think it would go nicely with a selection of marinated olives, garlic mushrooms, and wrinkled potatoes. Or, sit down to a bowl of it with a salad on the side and some crusty gluten-free bread (does such a thing even exist??).

Spanish Chickpea Stew

Ingredients

  • 2 tablespoons olive oil
  • 1 red onion, chopped
  • 4 cloves garlic, crushed and chopped
  • 12 oz package soy chorizo
  • 2 ripe tomatoes, seeded and chopped OR 1 15 oz can diced tomatoes
  • 4 cups chick peas, drained and rinsed
  • 2 teaspoons paprika
  • 1/2 cup chopped parsley (plus extra, for garnish)
  • Salt & pepper, to taste

Method

Heat the olive oil in a large stainless steel skillet over medium-high heat. Add the onion and saute for 5 minutes. Add the garlic and cook for 2 more minutes. Add the soy chorizo and cook for 2 minutes. Add the chick peas, tomato and paprika. Cook for 5 more minutes, stirring frequently to keep everything from sticking. Remove from heat and stir in parsley. Season with salt and pepper to taste. Serve hot, garnished with more parsley if desired.

Makes 6 servings.

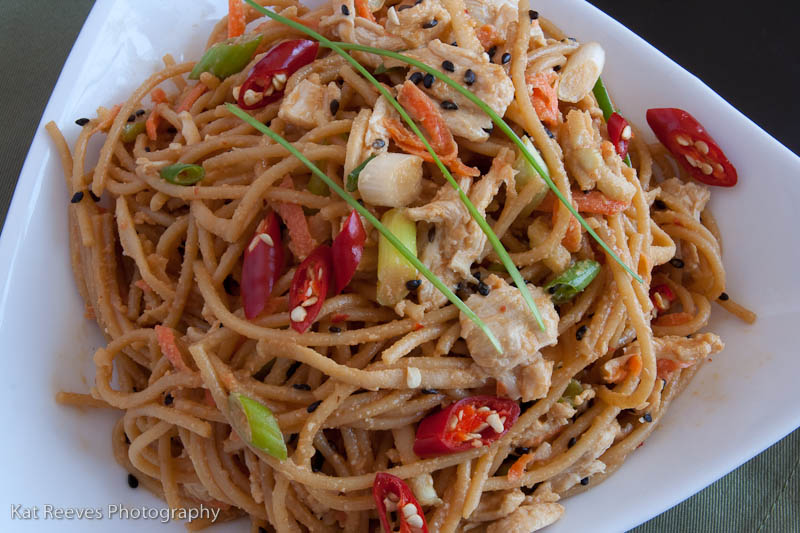
Spicy Ginger Peanut Noodles


I cannot tell a lie: this is one of my favorite noodle recipes to eat.

It’s not because I love peanut butter, and ginger, and sesame. It’s not because I love that you can make this as spicy or as mild as you like. It’s not because it’s super easy, although all those things are nice too.

It’s really because every time I make it, it’s a little different. Depending on what fresh ingredients I have in my fridge or growing in my herb garden, I can always change it up a little, and it always tastes amazing and fresh. And because of that, it’s easy to customize the recipe to include ingredients that you love, so that you can make it just the way you like it. Like a little extra heat? Just go for the max number of thai chilis. Like it a little milder? Seed one jalapeno and use that instead. Hate carrots? Leave ’em out. Crazy for ginger? Up the quantity to two tablespoons….

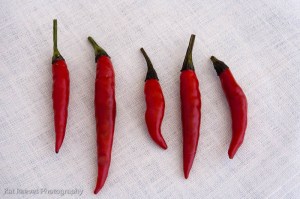
TIP: Smaller chilis are more potent than larger chilis of the same variety. Chilis grown in a hotter, more humid climate are spicier than those grown in a cool, dry climate.

TIP: If using the optional vegetarian “chicken,” read ingredients carefully before you buy to make sure that your variety is vegan. Also, look for brands that are made in the USA; brands made in taiwan or china may not include all ingredients on the label, and may not be vegetarian at all. If I am using vegetarian “chicken,” I go to my local asian mega-mart and look there. They carry US brands, and they are typically much cheaper than popular grocery store brands such as Morningstar Farms.

What other fresh ingredients would YOU add to these noodles?

Spicy Ginger Peanut Noodles

Ingredients

  • 12 oz spaghetti, preferably whole wheat
  • 1 tsp toasted sesame oil
  • 1/4 cup white sesame seeds
  • 3 tbsp peanut butter (chunky, smooth, or other)
  • 3 cloves garlic, roughly chopped
  • 1 tbsp fresh ginger, finely diced
  • 5 tbsp soy sauce
  • 2 tbsp rice vinegar
  • 1 -4 thai chilis, chopped (or 1 jalapeno, chopped, or 1 tsp tabasco sauce)
  • 2 tbsp brown sugar
  • 2-3 tbsp water
  • 2 tbsp black (or white) sesame seeds
  • 2 carrots, peeled and grated
  • 4 spring onions, sliced on the bias
  • 8 oz vegetarian “chicken” shreds, or strips sliced into long, thin pieces (optional)
  • Any other veggies or herbs  you want to add (i.e. celery or chilis sliced on the bias; shredded raw kohlrabi, turnip, or jicama; fresh parsley, mint, or chives; etc.)

Method

Break spaghetti in half before cooking (this will make it easier to distribute the rest of the ingredients evenly at the end). Cook pasta to al dente in salted water according to package directions. Drain, and place in a very large bowl. Add toasted sesame oil to the pasta, and use tongs to toss the spaghetti in the oil; this will keep it from sticking.

Meanwhile, place 1/4 cup sesame seeds in a dry pan, and toast over medium heat until aromatic and just starting to brown a little. Set aside to cool a little bit.

Place peanut butter, garlic, ginger, soy sauce, rice vinegar, chilis or hot sauce, brown sugar, and toasted sesame seeds into your blender. Blend until smooth. Add water 1 tablespoon at a time, until the mixture is the consistency of cream.

Pour the dressing over the noodles. Add the black sesame seeds, carrots, spring onions, veggie  chicken, and any other veggies or herbs to the bowl. Use tongs to toss. Serve room temperature or cold.

Makes about 8 servings.

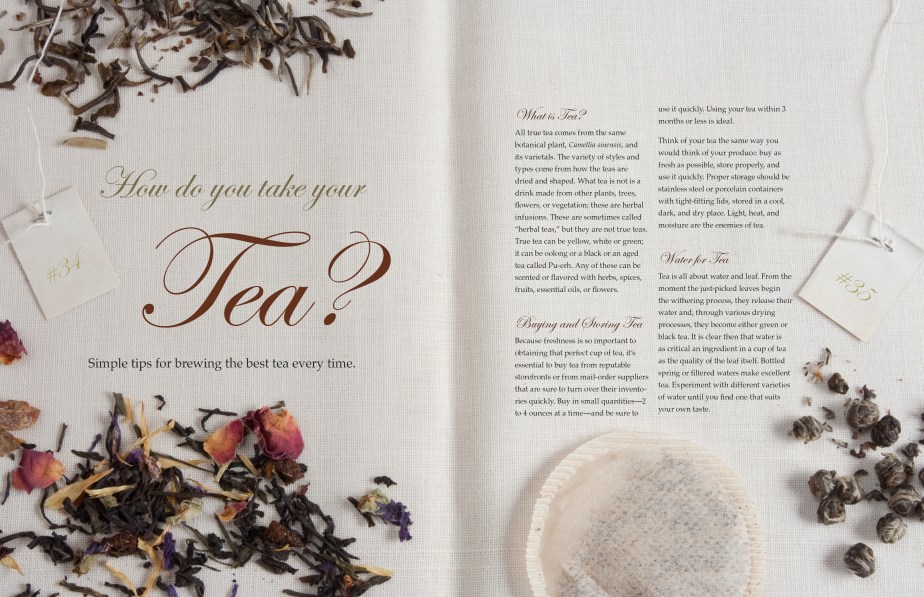
Tea

Hello! Anybody still out there? I know it’s been quiet in Kat-Food-land, but work and school have been very demanding lately. This week is finals week at school, so I’ve been preparing for that and haven’t been cooking much.

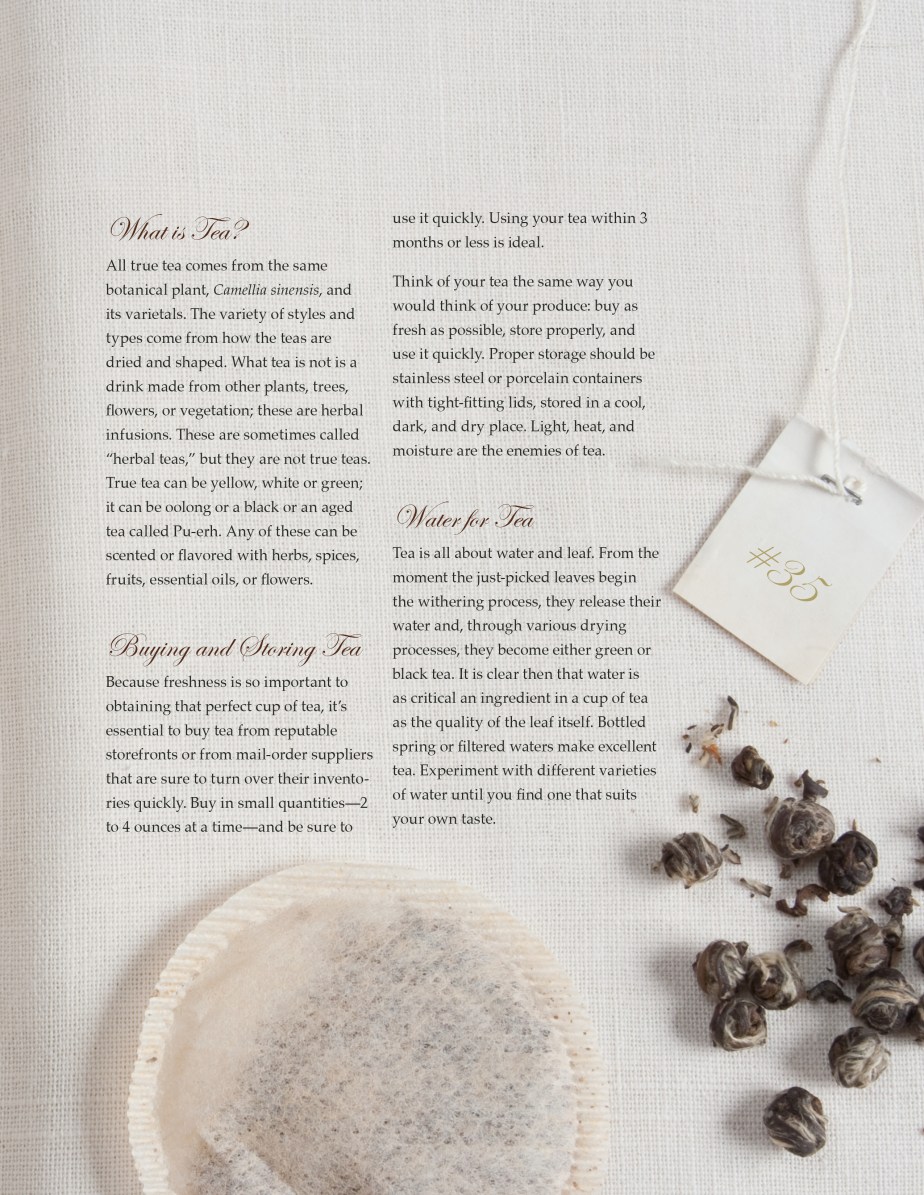
One of my current classes is typography, and for our final project, we had to create a two-page editorial spread. Of course I wanted to do a spread that could appear in a food magazine or cookbook! I took the photo for the spread, and arranged the type. So I thought I’d share my project with you here, since I don’t actually have a recipe to post at the moment.

But don’t worry, the recipes will be back soon. Enjoy the spread, and go make some tea!

Date Night Mini Pizzas

Even though we are married and see each other every day, Will and I still try to have a date night at least once a week; we’re both pretty busy people and it’s nice to have some time that is dedicated for us to just relax together and really talk.

One of our favorite date night things to do is make mini-pizzas together. This is really fun because we each prepare our pizzas side by side, share toppings, fling sauce at each other, and comment on how we each choose to arrange our toppings.

Into the oven they go… Then we pull them out, swoon over how beautiful our pizzas are, and sit down together to eat. We are never disappointed, because the beauty of mini-pizzas is that we each get make our pizza exactly the way we like it!

As if having a fun and tasty activity with your S.O. wasn’t good enough, it gets better…the crust is FAST and EASY. And it’s got whole wheat flour in it. And delicious herbs. And even though it has yeast in it, it only needs to rise for 15-20 minutes, which I’ve found is just enough time to prepare the toppings.

Here’s another great thing about the dough recipe, you can easily double or triple it for a crowd. Or double it, portion it, and refrigerate or freeze whatever you don’t use. Just remember that if you are going to store it, you should coat the inside of a zip top bag with cooking spray or a thin coat of cooking oil to make dough retrieval a snap.

TIP: You don’t really need any special equipment for this recipe, but a pizza stone is really going to make a huge difference in the quality of your crust, especially if you like a crispy crust. I would definitely recommend using one if you can.

Toppings are limited only by your imagination. Mini-pizzas are a great way to use up little odds and ends of produce that may be accumulating in your fridge. 1/8 of an onion? Slice it up. One lonely jalapeño? Adds some zing.

Will tends to like tomato sauce, onions, bell peppers, jalapenos, and daiya cheese on his pizza; he is pretty consistent. I like to try different things, so this week’s pizza was topped with pesto, daiya cheese, sauteed onions and garlic, and veggie sausage crumbles; I also put a big handful of torn arugula on top when the pizza was hot out of the oven. YUM!

What kind of toppings do you like on your pizza?

Date Night Mini Pizza With Herbed Whole Wheat Crust

Ingredients

  • 3/4 cup all-purpose flour
  • 1/2 cup whole wheat flour
  • 1 tsp instant yeast (about half a package)
  • 1/4 tsp sea or table salt
  • 2 tbsp fresh chopped herbs of your choice, OR a few pinches of dried herbs, crushed between your fingers (oregano, basil, thyme, whatever you have lying around)
  • 1/2 cup hot water (115º-125º F)
  • 2 tsp agave nectar

Method

Preheat oven to 425º F.

In your mixer’s bowl, combine AP flour, whole wheat flour, yeast, and salt and stir. Add water and agave nectar, and mix until smooth.

Switch to the dough hook and knead on low speed until smooth and elastic, about 3 minutes (–OR– knead by hand on a floured surface, 5minutes), adding whole wheat flour 1 tablespoon at a time if dough sticks.

Using a bench knife or sharp chef’s knife, cut the dough in half and shape it into smooth balls. Invert your mixing bowl over one, and place another deep bowl (or piece of lightly oiled plastic wrap) over the other and let rest 15 minutes.

Stretch or roll or toss each dough ball into desired shape and place on parchment paper (or a baking sheet, if you are not using a pizza stone). Turn over a small lip all around the edges and seal with your fingertip by pressing slightly. Have fun with toppings.

Cook in preheated oven for 12-15 minutes, or until dough is browned around edges and as crisp as you like it.

Yield: 2 mini pizza crusts